vue-router使用
作者:高天阳
邮箱:[email protected]
更改历史

* 2018-10-29        高天阳     初始化文档
* 2019-03-19        高天阳     添加vue-router history模式示例
1. 1 介绍
路由:控制组件之间的跳转,不会实现请求、不用页面刷新,直接跳转-切换组件
2. 2 安装
本地环境安装路由插件vue-router:
cnpm install vue-router --save-dev
- 没有安装淘宝镜像的可以将
cnpm替换成npm
想要安装的可以看这篇文章,(打开搜索镜像即可跳转到对应位置)
3. 3 配置
两种配置方法:在main.js中 || 在src/router文件夹下的index.js中
这里只说在src/router/index.js中的
- 引入
import Vue from 'vue'
import Router from 'vue-router'
注意这个Router是自定义的名字,这里叫这个名字后,下边都要用到的
- 使用/注册:
Vue.use(Router)
- 配置
配置路由
export default new Router({
  routes: [
    {
        path: '/',  // 到时候地址栏会显示的路径
        name: 'Home',
        component: Home   // Home是组件的名字,这个路由对应跳转到的组件。。注意component没有加“s”.
    },
    {
        path: '/content',
        name: 'Content',
        component: Content
    }
  ]
})
- 引入路由对应的组件地址
import Home from '@/components/Home'
import Home from '@/components/Content’
- 在main.js中调用index.js的配置
import router from './router'
- App.vue页面使用(展示)路由:
把这个标签放到对应位置
<router-view></router-view>
- 路由切换(原来的等地方):把切换标签和链接改成
<router-link  to="/">切换到Home组件</router-link>
<router-link  to="/content">切换到Content组件</router-link>
这里,to里边的参数和配置时,path的路径一样即可
4. 4 示例
/src/main.js
import Vue from 'vue'
import App from './App'
import router from 'vue-router'

/* eslint-disable no-new */
new Vue({
  router,
  render: h => h(App)
}).$mount('#app-box')
/src/router/index.js
import Vue from 'vue'
import Router from 'vue-router'
import Container from '../components/container/Container'
import Start from '../components/start/Start'
import Gesture from '../components/start/gesture/Gesture'
import Registered from '../components/start/registered/Registered'
import RegisteredDetail from '../components/start/registered/RegisteredDetail'
import Lending from '../components/lending/Lending'
import FinanceDetail from '../components/lending/financeDetail/FinanceDetail'

Vue.use(Router)

export default new Router({
  routes: [
    {
      path: '/',
      redirect: '/start'
    },
    {
      path: '/start',
      component: Container,
      children: [
        {
          path: '/',
          component: Start
        },
        {
          path: 'gesture',
          component: Gesture
        },
        {
          path: 'registered',
          component: Container,
          children: [
            {
              path: '/',
              component: Registered
            },
            {
              path: 'registeredDetail',
              component: RegisteredDetail
            }
          ]
        }
      ]
    },
    {
      path: '/lending',
      component: Container,
      children: [
        {
          path: '/',
          component: Lending
        },
        {
          path: 'financeDetail',
          name: 'financeDetail',
          component: FinanceDetail
        }
      ]
    }
  ]
})
5. 5 最佳实践
5.1. 5.1 Vue Router 的params和query传参的使用和区别
首先简单来说明一下$router和$route的区别
//$router : 是路由操作对象,只写对象
//$route : 路由信息对象,只读对象

//操作 路由跳转
this.$router.push({
      name:'hello',
      params:{
          name:'word',
          age:'11'
     }
})

//读取 路由参数接收
this.name = this.$route.params.name
this.age = this.$route.params.age
5.1.1 query传递参数
我看了很多人都说query传参要用path来引入,params传参要用name来引入,只是我测试了一下,query使用name来引入也可以传参,使用path也可以。
//query传参,使用name跳转
this.$router.push({
    name:'second',
    query: {
        queryId:'20180822',
        queryName: 'query'
    }
})

//query传参,使用path跳转
this.$router.push({
    path:'second',
    query: {
        queryId:'20180822',
        queryName: 'query'
    }
})

//query传参接收
this.queryName = this.$route.query.queryName
this.queryId = this.$route.query.queryId
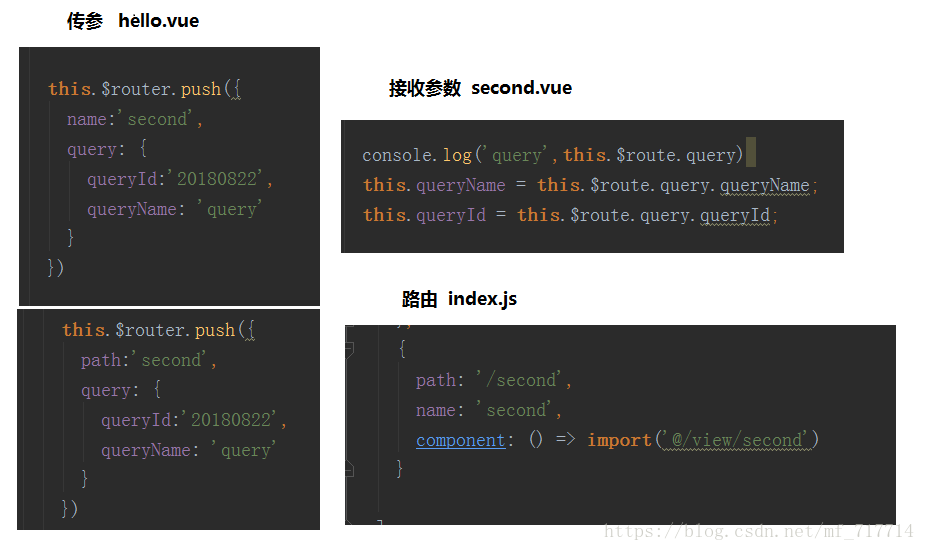
最终不管是path引入还是name引入效果都一样如下图

5.1.2 params传递参数
注:使用params传参只能使用name进行引入
使用params传参
//params传参 使用name
this.$router.push({
  name:'second',
  params: {
    id:'20180822',
     name: 'query'
  }
})

//params接收参数
this.id = this.$route.params.id
this.name = this.$route.params.name

//路由

{
path: '/second/:id/:name',
name: 'second',
component: () => import('@/view/second')
}
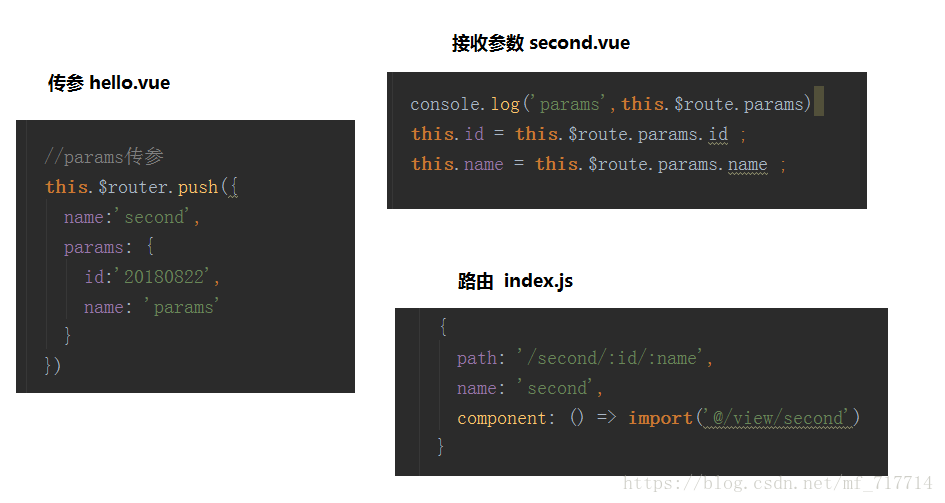
效果如下图
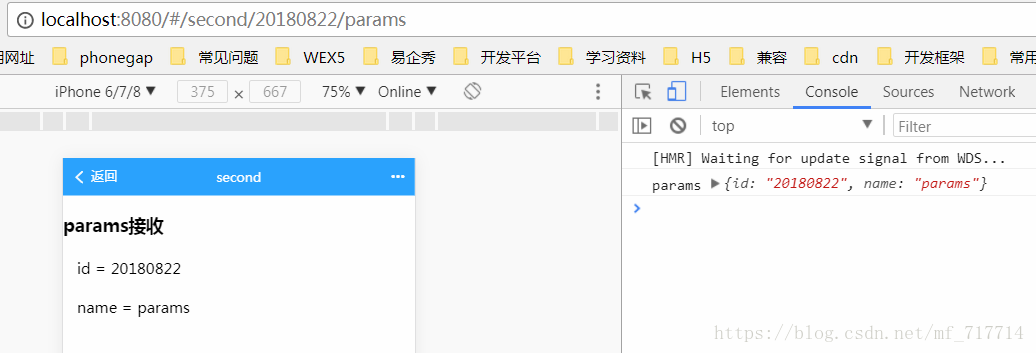
需要注意的是:
- params是路由的一部分,必须要在路由后面添加参数名。query是拼接在url后面的参数,没有也没关系。
- params一旦设置在路由,params就是路由的一部分,如果这个路由有params传参,但是在跳转的时候没有传这个参数, 会导致跳转失败或者页面会没有内容。
如果路由后面没有 /:id/:name效果如下图,地址栏没有参数
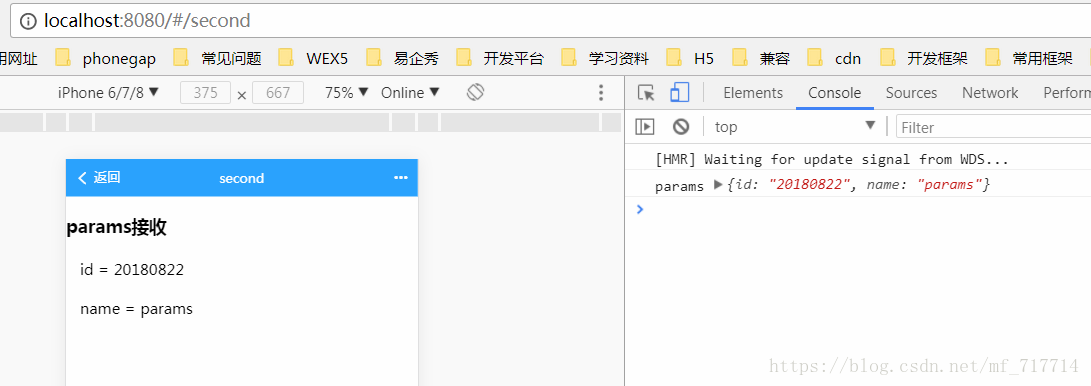
但是如果你刷新一下,就会发现页面失败,效果如下图

因此我们不可能让用户不要刷新,所以我们必须在路由后面加上 /:id/:name
如果使用path进行传参
//params传参 使用path
this.$router.push({
  path:'second',
   params: {
    id:'20180822',
     name: 'query'
  }
})

//params接收参数
this.id = this.$route.params.id
this.name = this.$route.params.name
效果如下图
使用path传参什么效果都没有。

5.1.3 总结
- 传参可以使用params和query两种方式。
- 使用params传参只能用name来引入路由,即push里面只能是name:’xxxx’,不能是path:’/xxx’, 因为params只能用name来引入路由,如果这里写成了path,接收参数页面会是undefined!!!。
- 使用query传参使用path来引入路由。
- params是路由的一部分,必须要在路由后面添加参数名。query是拼接在url后面的参数,没有也没关系。
- 二者还有点区别,直白的来说query相当于get请求,页面跳转的时候,可以在地址栏看到请求参数, 而params相当于post请求,参数不会再地址栏中显示。
5.2. 5.2 Vue-Router的History模式
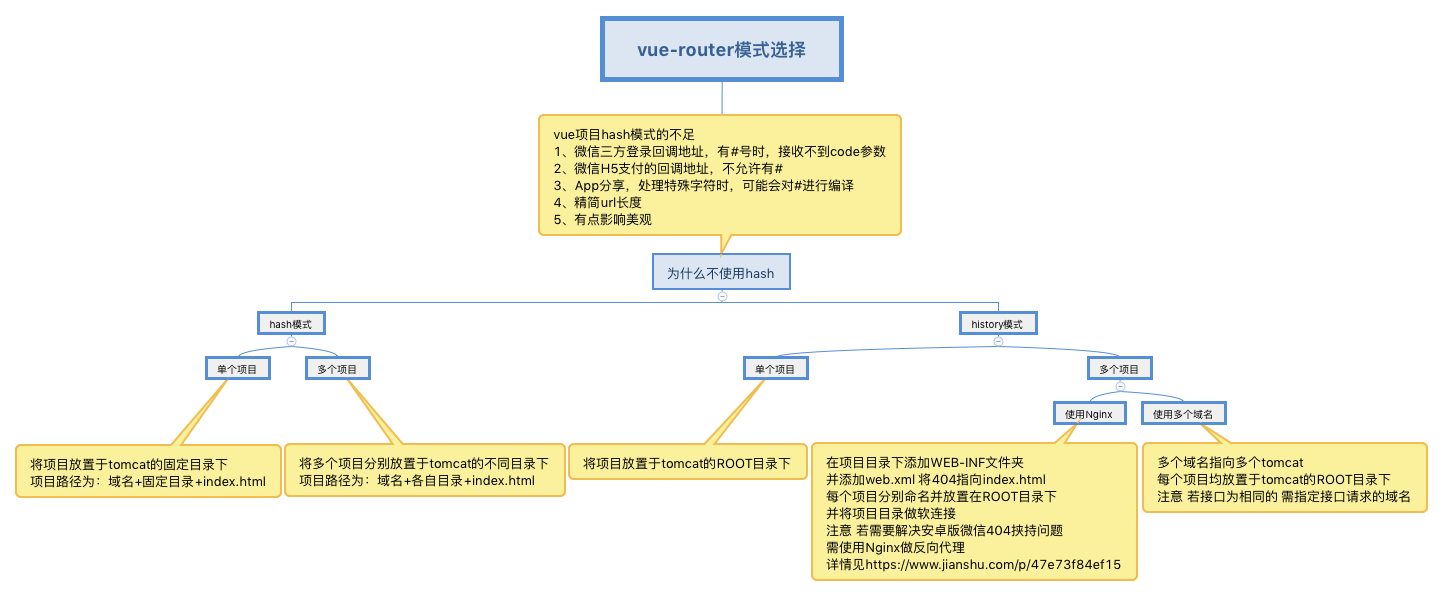
vue-router 默认 hash 模式 —— 使用 URL 的 hash 来模拟一个完整的 URL,于是当 URL 改变时,页面不会重新加载。
如果不想要很丑的 hash,我们可以用路由的 history 模式,这种模式充分利用 history.pushState API 来完成 URL 跳转而无须重新加载页面。
const router = new VueRouter({
  mode: 'history',
  routes: [...]
})
当你使用 history 模式时,URL 就像正常的 url,例如 http://yoursite.com/user/id,也好看!
不过这种模式要玩好,还需要后台配置支持。因为我们的应用是个单页客户端应用,如果后台没有正确的配置,
当用户在浏览器直接访问 http://oursite.com/user/id 就会返回 404,这就不好看了。
所以呢,你要在服务端增加一个覆盖所有情况的候选资源:如果 URL 匹配不到任何静态资源,则应该返回同一个 index.html 页面,
这个页面就是你 app 依赖的页面。
5.3. 5.2.1 前端配置
5.2.1.1 路由配置
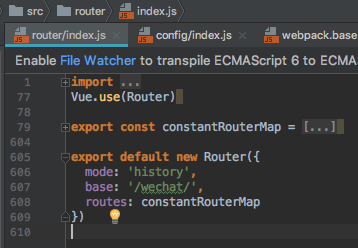
修改后 uri跳转时携带固定url前缀
// src/router/index.js
export const constantRouterMap = [...]
export default new Router({
  mode: 'history', // hisroty模式
  base: '/wechat/', // 路由跳转时携带url
  routes: constantRouterMap // 路由结构
})
原跳转为
http://localhost:8081/home=>http://localhost:8081/content现跳转为
http://localhost:8081/wechat/home=>http://localhost:8081/wechat/content
5.2.1.2 配置文件
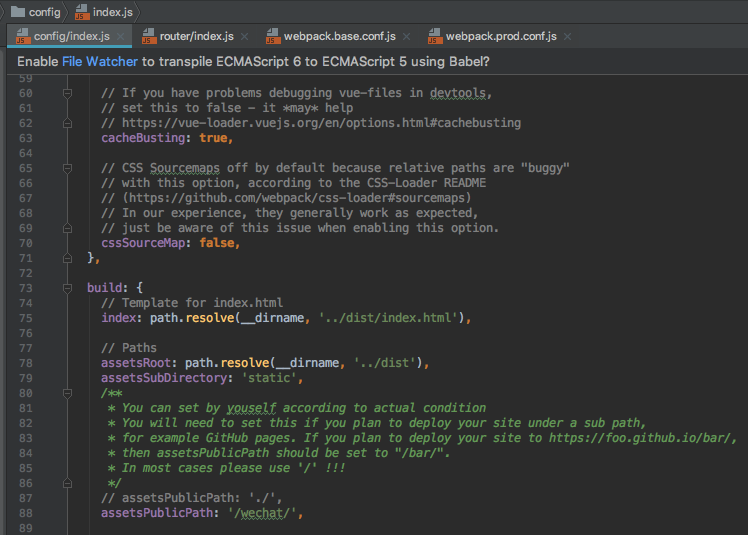
修改后js、css资源请求地址为
assetsPublicPath+打包地址
// config/index.js
build: {
    // Template for index.html
    index: path.resolve(__dirname, '../dist/index.html'),

    // Paths
    assetsRoot: path.resolve(__dirname, '../dist'),
    assetsSubDirectory: 'static',
    /**
     * You can set by youself according to actual condition
     * You will need to set this if you plan to deploy your site under a sub path,
     * for example GitHub pages. If you plan to deploy your site to https://foo.github.io/bar/,
     * then assetsPublicPath should be set to "/bar/".
     * In most cases please use '/' !!!
     */
    // assetsPublicPath: './',
    assetsPublicPath: '/wechat/',

    /**
     * Source Maps
     */

    productionSourceMap: true,
    // https://webpack.js.org/configuration/devtool/#production
    devtool: '#source-map',

    // Run the build command with an extra argument to
    // View the bundle analyzer report after build finishes:
    // `npm run build --report`
    // Set to `true` or `false` to always turn it on or off
    bundleAnalyzerReport: process.env.npm_config_report
}
5.4. 5.2.2 后端配置
5.2.2.1 tomcat配置文件
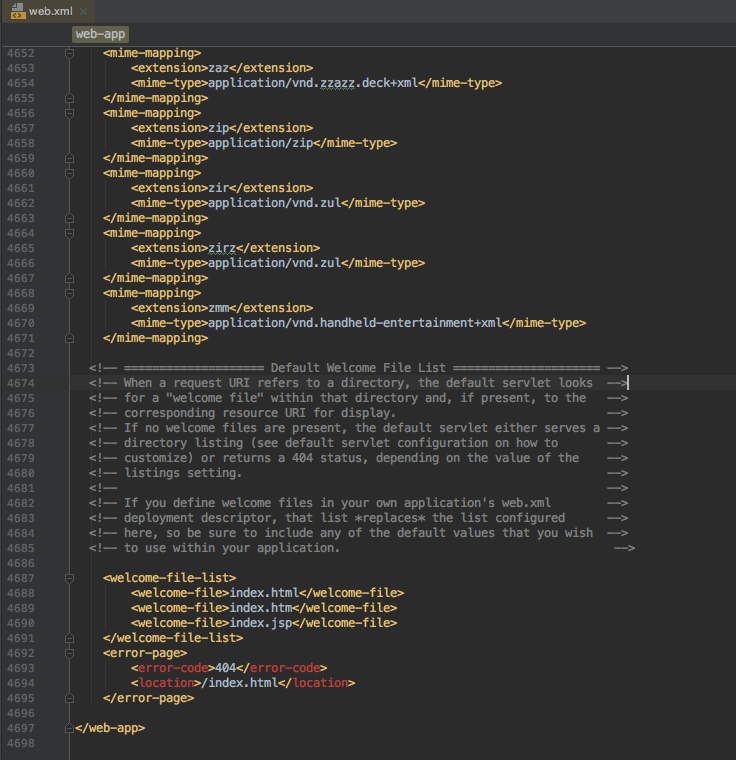
修改后页面刷新404时指向index.html
// tomcat-x/conf/web.xml

<error-page>
    <error-code>404</error-code>
    <location>/index.html</location>
</error-page>
5.2.2.2 项目配置文件
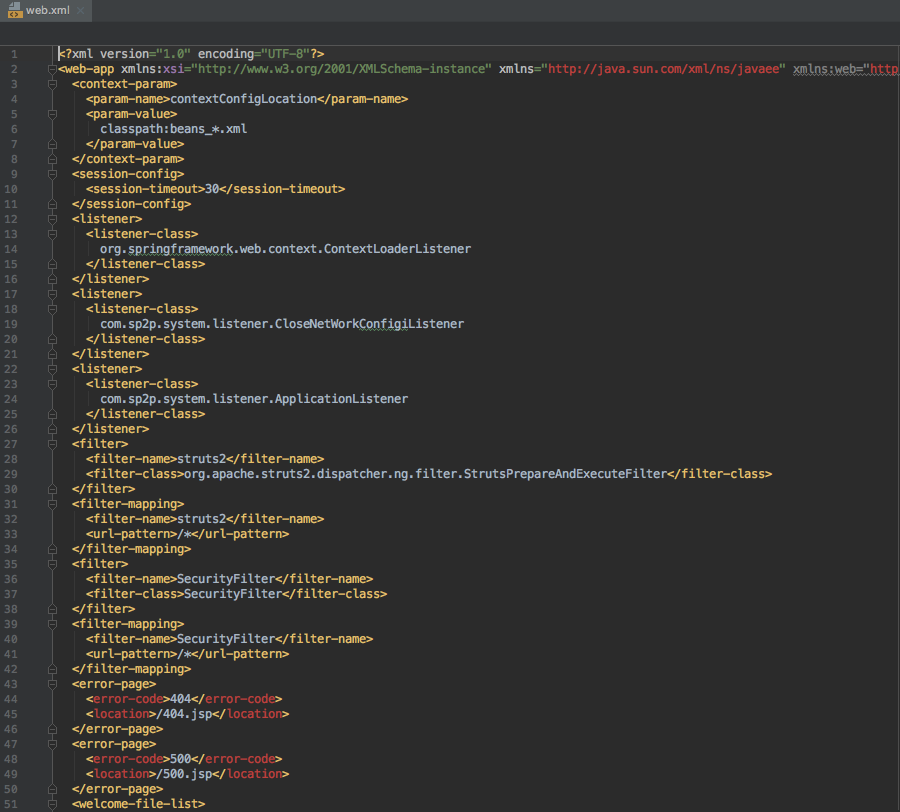
修改后异常页面404指向404.html
// tomcat-x/webapps/ROOT/WEB-INF/web.xml

<error-page>
    <error-code>404</error-code>
    <location>/404.html</location>
</error-page>
5.5. 5.2.3 采坑记录
5.2.3.1 资源路径异常
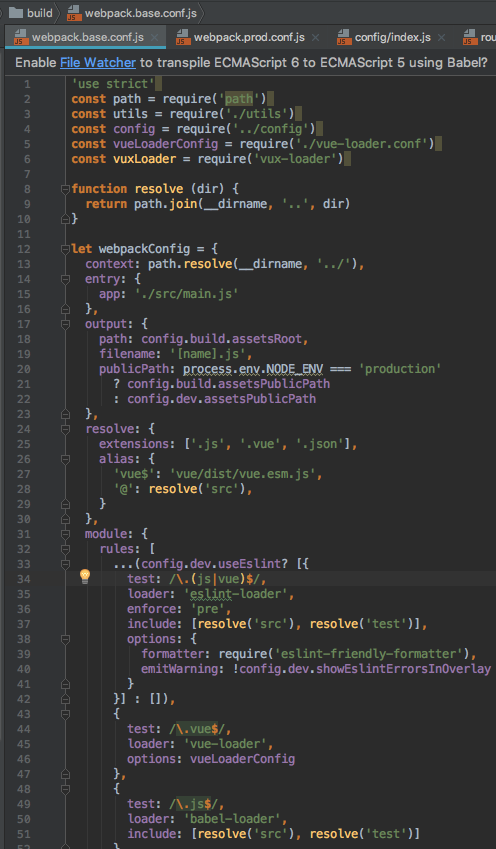
之前为处理js、css打包后找不到 修改了webpack配置文件 导致在修改history模式时 资源路径不正常
// build/webpack.base.conf.js

let webpackConfig = {
  context: path.resolve(__dirname, '../'),
  entry: {
    app: './src/main.js'
  },
  output: {
    path: config.build.assetsRoot,
    filename: '[name].js',
    publicPath: process.env.NODE_ENV === 'production'
      ? './'+config.build.assetsPublicPath // 此处'./'+应省略
      : './'+config.dev.assetsPublicPath // 此处'./'+应省略
  }
  // ...
}
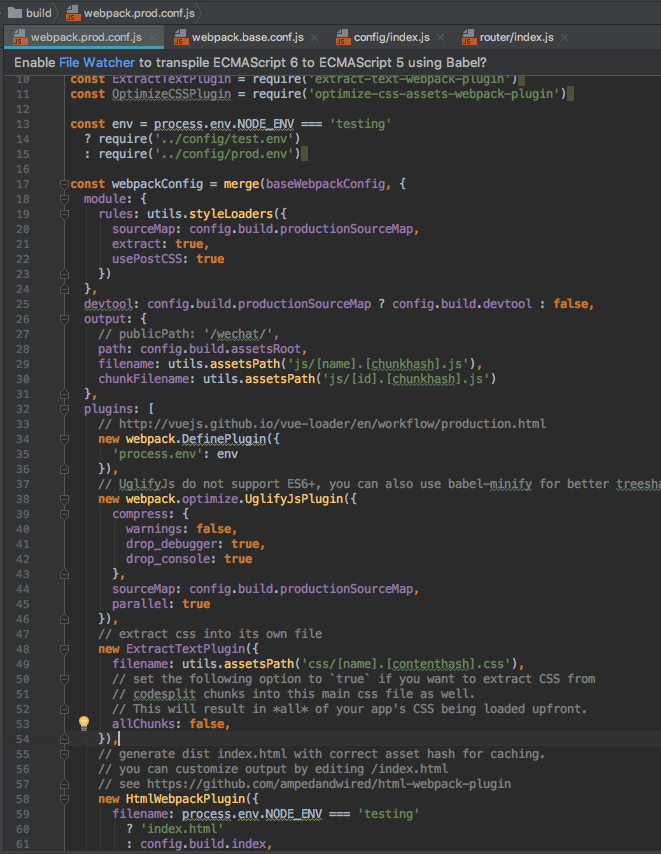
若不修改webpack.base.conf.js 可修改webpack.prod.conf.js
// build/webpack.prod.conf.js
const webpackConfig = merge(baseWebpackConfig, {
  module: {
    rules: utils.styleLoaders({
      sourceMap: config.build.productionSourceMap,
      extract: true,
      usePostCSS: true
    })
  },
  devtool: config.build.productionSourceMap ? config.build.devtool : false,
  output: {
    publicPath: '/wechat/', // 添加打包时资源请求前缀为/wechat/
    path: config.build.assetsRoot,
    filename: utils.assetsPath('js/[name].[chunkhash].js'),
    chunkFilename: utils.assetsPath('js/[id].[chunkhash].js')
  }
  // ...
}
5.2.3.2 安卓版微信浏览器404挟持
PC、iOS均可正常跳转 但安卓版微信浏览器会挟持跳转至404公益页面
原因是当安卓版微信发现接口返回404时 直接做了跳转处理
那么就需要把请求的404完全消除 才能解决此问题
使用Nginx反向代理
location / {
  try_files $uri $uri/ /index.html;
}
结果reload配置之后 页面出现空白 状态改成200了 但是static路径找不到了
location /static/ {
  root /;
  try_files /tmp$uri /srv/www/site$uri =404;
  expires 30d;
  access_log off;
}
可以把/static/单独拎出来做匹配 其他路由都跳到/index.html
upstream ups_ucar_wx {
  #ip_hash;
  #consistent_hash $remote_addr;
  server 192.168.8.59:8080;
  #check interval=10000 rise=2 fall=5 timeout=1000 type=http default_down=false;
  #check_http_send "GET /health HTTP/1.0\r\n\r\n";
}

server {
  listen      80;
  server_name   xxx.com;
  charset     utf-8;
  access_log  logs/xxx.access.log  main;
  error_log   logs/xxx.error.log;

  #include /etc/nginx/agent_deny.conf;

  location / {
    proxy_pass  http://ups_ucar_wx;
    # 具体做什么,不懂,不过不加会显示400
    proxy_set_header Host $host;
    proxy_set_header X-Real-IP $remote_addr;
    proxy_set_header REMOTE-HOST $remote_addr;
    proxy_set_header X-Forwarded-For $proxy_add_x_forwarded_for;
    # 匹配不到的路径,都跳/index.html
    try_files $uri $uri/ /index.html;
  }

  location /static/ {
    root /;
    proxy_pass  http://ups_ucar_wx;
    # 具体做什么,不懂,不过不加会显示400
    proxy_set_header Host $host;
    proxy_set_header X-Real-IP $remote_addr;
    proxy_set_header REMOTE-HOST $remote_addr;
    proxy_set_header X-Forwarded-For $proxy_add_x_forwarded_for;
    # 设置过期时间
    expires 30d;
  }
}
重点
try_files $uri $uri/ /index.html;
location /static/ {
    root /;
    proxy_pass  http://ups_ucar_wx;
    # 具体做什么,不懂,不过不加会显示400
    proxy_set_header Host $host;
    proxy_set_header X-Real-IP $remote_addr;
    proxy_set_header REMOTE-HOST $remote_addr;
    proxy_set_header X-Forwarded-For $proxy_add_x_forwarded_for;
    # 设置过期时间
    expires 30d;
  }
5.6. 5.2.4 vue-router不同模式对比
